Tuesday, April 16, 2013

Saalbach 2013 - A Weather Related Downer.


Skiing holidays and just how reliant they are on the weather  can be one of those great conundrums, how best to manipulate those weather patterns to get the best ski holiday. Having ski biked with the lads late in March, we decided due to the abnormally poor snow conditions of the last two years, to go a bit earlier. So early March we all set off for our favoured resort Saalbach and Hinterglemm, let the fun begin.


The boys getting ready for the days fun.

Well as I had already experienced very very good conditions not far from Hinterglemm just a few weeks before, the dreary rain filled skies were not what we were expecting when we got there and nor the reports of warm rain, right to the top of the mountain for the previous 3 days. Well as you are now getting the picture, the snow was just sugar snow from top to bottom, you could get off your bike at the bottom and sink up to your knees, really strange to say the least but manageable on the bikes until the weather turned cold on day 3, -14C cold. Well our fun but slushy slopes now turned into one big ice block from top to bottom. And then we had snow and then we had white outs, what a downer. Fortunately the sun did come out on day 6 so we had a good day to finish on

So I have to report that the ski bikers in the party really did suffer this year and no, we as a group didn’t improve on last year's standard, ice is not fun on the bikes and some of the party really struggled to get some sort of confidence going on the slick surfaces. Early finishes, shortish days and long bar sessions were the norm I’m afraid.  Certainly those who have toughed out the couple of days needed to learn how to constantly freestyle ( standing on the pegs ) seemed to be able to handle these conditions better and seem to be moving ahead, technique wise, of those who are committed seat sitters.

So was the holiday that bad? Hinterglemm where we were staying certainly can be Apres skiing Nirvana and to say it didn’t disappoint was true to say the least. Oh there was some memorable and epic nights out this year and I still have vivid memories of a couple of the ski bikers riding the Harley in the Rock Bar at 2.00am, now when I say the Harley is 3.0 metres up, bolted to the ceiling and laying sideways, well you get the picture.

So lets get back to skibiking, and what can I report about Saalbach and Hinterglemm this year. A strange report really as all but one lift, really are not bothered about whether you have foot skis or not, often the lifties will ask that you only go up one at a time, perhaps insist on being on the inside seat, ask that you use the alternative train perhaps, but there is always one liftie who is going to be a problem,  isn’t there. The guy on the Hochalm Sesslebahn above Hinterglemm will insist that you have foot skis on. Well we went prepared and it was worth the picture on his face when we whipped out our mini skis from our rucksucks and put them on. Almost a “damn you have got me there then”.

Footskis made from 1/2 blade and ice grips

We simply cut a pair of 90cm long blades in half and fitted “ice grips “ to make sure they fitted our boots easily. The blades were £ 35.00 delivered ( Ebay ) which made 2 pairs and the ice grips were £ 3.50. I simply took the plastic ice stud out of the rubber strap and then screwed the foot part to the ski. I think I’ll modify them a bit as I tried to actually ski on them and they need some sort of rear guide, rather like a cross country ski binding. A simple light weight piece of Ali would be enough.  

Interestingly I tried to push the boundaries on where the lifties would say no, the long Barnalm T-Bar lift that you need to get from Saalbach toHinterglem and back from Lengau to Hinterglem where you have to take a short but steep T-bar to be able to get enough height, were interesting to say the least but doable. Do put the T-bar under the bike seat, against the seat stem, rather than your bottom, seems to work the best. Pomas are relatively easy contrary to Mark's experience and simply put the Poma between your legs as per normal and then sit on it. 

Over the last two years we have never really found the ideal boot solution. We’ve tried snowboard boots, but find them bulky and a bit too stiff, we tried cheapo Apres Ski boots, we’ve tried “Wellies” with thermal socks, all but the Wellies leak water within a few days and the Wellies are as cold as heck. One of the team had “Muck” boots this year, basically a toughened “ Wellie “ with a neoprene liner. They are really really good, don’t leak and are very warm, highly recommended.

We all seem to now be wearing wrist guards of some form or other, some seem to be using the standard Snowboard guards but we all seem to be moving across to the Dakine mitts with internal guards. They are not as tight fitting as the dedicated guards but do enough to suit the bikes. Certainly with the large quantities of ice about this year, they were tested pretty well with all of us at some stage being lobbed out of and over the handlebars due to the front ski tucking under ( as your technique gets better the less it happens ).

Well that’s about it for this season and looking forward to the next.
Wayne.

Saturday, April 13, 2013

#3 Urban RetroBike Tour Around London


The curse of the Urban RetroBike tour strikes again, yes bad weather, today was forecast to be the warmest so far, even into double figures! Unfortunately precipitation was going to be the issue this time, even my postman quipped that I should be "home by 1pm" as he saw my readying to leave in fine sunny morning weather, it wasn't a day to be hanging about.
On Friday night I found myself packing sailing waterproofs as well as the more normal riding gear. Likewise I wanted to take out the Marin Muirwoods, but went for the wet weather friendly option of my Muddy Fox Tourist hybrid, with its freshly fitted new SKS lightweight mudguards.

I met up with al-onestare at East Croydon station in fine weather, but with the forecast in mind made a steady run over to Blackheath for the obligatory picture at the statue of General Wolfe. With only moments to spare I enjoyed the delightful run down the hill to the Cutty Sark to pick up Secret Squirrel. He was easily identifiable by the blingtastic nature of his Orange, mmm carbon fibre titanium composite forks yummy! It was then that the first few spots of rain were felt and the clock was ticking.

The obligatory picture at the statue of General Wolfe

We headed straight over to Stratford via some the rougher areas of East London "Some nice places you take us to, Purley" was quipped... the joy of this ride, I explained, is in the contrasts. We picked up the Regent's Canal, stopping for a quick break at a new canal side place near Haggerston. Shortly after, the "Curse of the Kona" struck, with al-onestare suffering a puncture at exactly the same spot as fellow Kona rider Watley Meister had his first puncture on Urban RetroBike #2! The puncture was soon located in the inner tube, meanwhile I checked the outer casing, turning it inside out and feeling with my fingertips for the cause and finding nothing.
The wheel was reassembled and inflated only to immediately deflate due the large fragment of glass embedded right through it that I had totally failed to spot, what a school boy error. Luckily, I had a spare inner tube of a suitable size in my kit and the tyre was reassembled again, with better result this time.

The joy of this ride, I explained, is in the contrasts

Fortunately this was the only mechanical issue for the entire journey and with the temperature falling, wind picking up and clouds looking ever more threatening time was definitely not on our side.

Crowd barriers were already being installed at St Paul's Cathedral in advance of the funeral of Margaret Thatcher, which, along with roadworks, made the usual photo opportunity difficult. Likewise, at Trafalgar Square, a crowd was gathering to celebrate the death of Margaret Thatcher, although to be honest, judging by the amount of fluorescent yellow on show, the Police presence was somewhat disproportionate in my opinion.

These RetroBikes are not for hire

As the boys didn't want to do photos at Buckingham Palace we headed straight to Vauxhall, Secret Squirrel staying with us as far as the river. Then it was heads down for the long stretch South into a gathering headwind.
I surprised myself by managing to ride the direct route up to the top of Crystal Palace Hill, al-onestar overtaking me and once he was out of sight, I made a sneaky halt for a minute's breather. As al-onestare was heading in the direction of Bromley, we tried a run through the paths in Crystal Palace Park, which were rather good and preferable to the local roads, certainly worthy of further investigation in future.

RetroBikers

The rain really set in on the last 20 minutes of the journey home, I even stopped under the Croydon flyover and donned my Helly Hansen sailing jacket to get some additional protection. Hopefully, one day we might even make this trek in fine weather, take in the views and amble along without risking hypothermia, or drowning.

Sunday, March 24, 2013

Skibike Lessons - Every Cloud Has A Silver Lining

Today brought an unexpected meeting with Mark Bayston, we've been swapping e-mail for the last few weeks but it wasn't my intention to meet face to face. Mark has been a keen skier in the past, but following complications caused by a car accident some years ago, he was recently told by his doctors not ski again.
Anyone who has fallen for the lure of snowsports would dread hearing such news and to make things worse a family ski trip for Easter was on the cards.

Mark began searching for an alternative snow sport and was surprised to see how much skibiking has evolved in just the last few years. Even better he was thrilled to see that his favourite resort of Les Carroz is now a popular "skibike friendly" destination. But with only a few weeks to go and faced with a dearth of local rental options, I offered to rent out one of my own skibikes. Simple and basic they might be, but they are a good tool to get around on and hone your technique.

I had planned to send the skibike to his work address by courier, so spent a good few hours sorting out a decent box, spares kit and packing method. I arranged a courier company only to find out the next day, when they were due to collect, that they won't transport bikes, how stupid is that? This was quite a curved ball, checking the calendar I realised that by the time and alternative service had been arranged and the collection made, he would be lucky to get the skibike on the day of his planned departure.

Call me cynical but I know that Murphy's Law would apply, there would be further unexpected problems and he would end up leaving for France empty handed. I hate disappointing people, so I suggested that we meet up at a mutually convenient location. Simultaneously, there was an extended spell of unseasonably cold weather, with substantial snow fall in a band from The Midlands heading North and extending right up into Scotland.

I made the bold suggestion that rather than meet at a motorway service station, why not find a suitable sledging hill and have a skibike session together? To my surprise Mark seemed quite keen on this idea, an enquiry on the RetroBike forum brought forth the immediate suggestion to try Darley Park in Derby.

Mark Bayston - on the pegs


I set off painfully early at 7:30 on Sunday morning and made the chilly trip North on deserted roads, there was little snow to be seen at first, just a dusting over The Chilterns. But on the outskirts of Coventry, things began to look interesting, I took a wrong turn and found myself on a snowy road, and by the time I pulled up at Darley Park in Derby it was about 4" deep, not much by Haute Savoie standards, but pretty good for anywhere in the UK.

I made a quick recce on foot, the hill looked perfect, exactly the sort of Green Run you would choose to take a novice skibiker on. I headed back to the car, assembled the first skibike and when Mark arrived a few minutes later, he got to build the one he would be taking to France with him.

I then demonstrated how they can be easily carried over the shoulder and we set off for the hill. Straight away we practiced some "Throw a leg out" skidded turns, before moving on to the more tricky turns on the pegs. Amazingly Mark picked up on the technique quickly and there were none of the typical beginner crashes.

Pushing the skibike back up the slope repeatedly can test your lung capacity, so for a break we used a park bench to play "ride the chairlift". We then had another half a dozen or so runs before retiring to a stunning pub lunch.


None of the typical beginner crashes

After Mark's departure, I was tempted to go hunt out some nearby "steeps" so I made a gentle drive up the A6 North to Ashbourne in search of a bigger hill, with a plan to find a bed and breakfast overnight. Sadly there was not that much snow on the ground, a good deal had been scoured by high winds and deposited onto the road, some sections of which were reduced to single track. With a heavy heart I abandoned my quest, turned the car around and headed for home.

I really enjoy these backyard ski trips, they feel really sneaky, as if you are cheating in some way.

Sunday, March 17, 2013

Wayne's New D.I.Y. Skibike

If you want to talk the talk then I’m a great believer that you then have to walk the walk. On many an occasion I have questioned the validity of some of the spurious ski bike builds I have seen and the direction we as a group have gone in the way we are building and designing ski bikes.

So at some stage I thought I would take on the whole process of design, build and then trial all those ideas of mine. It may seem a little daunting but having now been through this process it was actually quite a lot of labour intensive fun with a great result, well at least I think so.


Skibike frame had to fit into a double ski bag

So some criteria first. The bike frame had to fit into a double ski bag for easy air travel, seem like a bike to stand on, fit the lifts, handle my lardy frames weight, be less than 10 kilos all up including the skis and be better than the original bike I had built 2 years ago which seemed to be pretty good out of the original design build.

Scratch built - 100+ hours of time
OK measure up the original bike and convert it to a CAD drawing and then modify the few points that I thought were wasteful, wrong, overweight or simply not needed. So first thing to go was the rear suspension, as a non jumper, XCountry type and I freestyle all of the time, my own suspension ( legs ) would do. Change the rear ski mount to get as low a COG of the pivot as possible ( to get best edge control ), increase the head angle to about 72 degrees to reduce any head shake along flat paths, what else, be a minimalist to reduce the weight.

So then create a full size CAD drawing, place it on some foam, cover with a mix of carbon and glass in all the right places, fill prime and paint. What more could one do. Sounds easy but I bet there was 100 – 150 hours of time involved. Now on one’s winter evenings what more has one to do, Ok quite a lot and it did take me about 3 months to fully finish the bike and a further 10 hours or so to repair and resolve the couple of issues I had from the first day I rode it ( the front seat post bolt pulled out of the frame which then broke the rear mount, yes the sound of breaking carbon fibre is not a good sound )

Skibike- 3 months to fully finish
Super light - just 7.2 kilos


Was it all worth it, mmmm yes and no. Great fun and a great bike to ride but definitely not a bike to learn on, its like a light weight race horse that just takes no prisoners, the slightest bit of weight on either peg and it will head in that direction, get the process of upweighting and changing the peg pressure wrong and it simply picks up speed in comparison to the fully suspended bike I had been used to which is a very forgiving bike. On the plus it is very very light, just 7.2 kilos including the skis ( my Vokll AC30 skis are just over 7 kilos ), it has now survived a pretty damaging ( constant ice and lumpy snow ) of a hard week of testing and nothing has broken, plus it is drop dead gorgeous to look at and if I thought the last bike caused a few heads to turn, then this one really does get people asking where they can get one from. 
Overwhelmingly fast

Would I change anything, on the first day I rode with a suspension seat post ( gives about 50mm of travel ) to give a little comfort on the drag lifts and when just cruising about, on the week of testing I had a normal seat post and man was that a solid ride up lifts, ouch but it did make me freestyle all of the time. I do like the way the lowered COG of the pivot on the rear ski works and I really do like the low weight to and from the lifts and going up the lifts. But I cannot recommend the directness and positive response you get from having no rear suspension, for the learner it’s just overwhelmingly fast and could easily put people off the sport. At my stage of ski biking it took a little to relearn but once I had found how little input was needed to turn and how best to use the bike, it was a sheer joy. I would liken it in skiing terms to the difference between a learners ski and a full on slalom racing ski which a beginner would not be able to use well.
  Great skibike to ride but not to learn on

So should I make the plans and build schedule available, if enough of you convince Mark then perhaps I can put the time in to document the build and make those available. With good resources available now on the web on how to build composite ( carbon and glass ) structures plus composite materials being widely available, it is doable. 

Next Autumn I'm going to modify the plans and build a rear suspendered version to just see what the real merits / differences are of the rear suspension issue, just to compare. Looking foward to next autumn then, but now its late March and its time to pack up the winter toys and get back to playing with racing cats.

Monday, March 4, 2013

Wayne's Italian Excursion


Waynes Part 3: Italy and the Ski Dolomiti

I have skied in some big interconnecting areas this year and I thought Ski Amade was big, but the Ski Dolomiti, the 4 Ladin valleys Alta Badia, Val Gardena, Val di Fassa,  Livinallongo is just unbelievably feckin huge. You can ski all day and not really touch a mere fraction of the available slopes. Looked it up and yup, only 450 lifts and 1200km of piste to choose from, all on the one ski pass. I have to say on one clear day from the highest point at Arabba, you could look in every direction and as far as the eye could see, you could see ski lifts. Awesome or what, or if you are of that eco way inclined, sheer purgatory.


As far as the eye can see, lifts and yet more lifts
 
Sadly without the ski bike, on a family holiday at half term is always not a bright idea, but my daughter is a school teacher and needs must. So to Ortisei we went and what a charming Sud Tirol town, built in a semi strange architecture which I cannot place ( do enlighten me ) but a real charmer of an old fashioned Italian town with all the mod cons of a pretty decent ski area interconnecting to the Sella Ronda lift system via Santa Cristina, with its new underground train shuttle linking the two sides of the valley.

Val Gardena is a real mix of old and new with some of the oldest chairlifts on the Alpe Di Suisi I have seen and yet there are 100 person cable cars and plenty of new 6 seaters in the Santa Cristina area. Lots of different ability slopes and some pretty impressive long runs of about 12km available if you want. Nothing really hard and difficult but big wide open slopes that are well looked after and a good snow record, what more can you want.

Old hotels on the road passes double as ski resturants in the winter

The Sella Ronda loop is a loop that runs either clockwise or counter clockwise around the massif of the Sella mountain range, keep that great big rock face on your left or as we did the following day, on the right. About 8000 metres of vertical and about 50 km of downhill run, it’s a pretty hectic 6 hours or so to get from Ortisie, to Santa Cristina and then onto the Sella Ronda proper and back home to, yes we found it, a really cool little bar just before bottom station which served the thickest hot chocolates for the girls and good beer for the boys. Along the way you’ll experience every type of lift known to man and ski some pretty tasty runs. One of the ski things that I have heard about ( about 20 years ago there was a section that horses pulled you across a flat area on your skis ) and needed to be ticked off as being done in my ski career.

So there has to be a downside doesn’t there. Well yes and no, pretty impressive resort but at peak times we had some long queues, nearly an hour to get from village level to the top at Ortisei one morning. If you can avoid that 10 o’clock morning rush by leaving a bit earlier then the waiting time seemed to get down to the 30 minutes or so. Once everyone had spread out though, queues seemed to be few and far between. My guess out of peak season there would be no problems. The other thing that sort of niggled me was Italy just isn’t cheap at all. In neighbouring Austria we could get a good soup and bread roll for lunch at 5 Euro or so, Italy it was closer to 9, beers a Euro dearer and the lift pass a good 30 Euros dearer for the week. The Wiener Schnitzel test,  about 2 – 3 Euros more expensive. Over a week it does add up and even though we stayed in some great but reasonable accommodation ( Garni Floreal ) at 32 Euro a night inclusive of breakfast, it was an expensive ski holiday. But don’t let me put you off, it is very very nice and worth a visit.

Umm, is it ski bike friendly, I asked at the lift pass office and they couldn’t say as no one had asked the question before, I didn’t see any ski bikes, a couple of SnowScoots on the Sieisa, on a lift servicing a  toboggan run ( they do like these runs in the Tyrol area ) but that was it. But here is the big but and I think this is starting to happen on other lift systems as well. A lot of the chairs had children anti “fall off the lift” restrictors fitted. Difficult to describe, but basically a strip of thick plastic, which when the safety bar is down, fits down between your legs and literally locks you in place. It would certainly be a problem for the way I transport the bikes up the lift and it really niggled my snowboarding daughter who has to sit sort of cross ways to accommodate the board, the said plastic restrictor kept on pinching her legs. With the death of the young English girl a few weeks ago just down the road from Ortisei, when she fell from the chair lift, then I can only see more of these being fitted.

Do give the Dolomiti Superski a go, the region and the Dolomite mountains are very different in so many ways and yet charming in their own way.

Saturday, March 2, 2013

D.I.Y. SkiBike On A Budget

I had been itching to build a second skibike for at least a year, the plan being to be able to offer anyone the chance to join me for some guided skibiking. What I didn't have, was unlimited time or money at my disposal. So let me make myself clear, this article won't be about a ghetto skibike costing pennies, nor will it be about the sort of machine for an expert who wants to make 30' cliff drops. This article will be about making something that will look good, perform well and most importantly, not fall apart miles from base camp. I anticipated the cost would be around £500, so let's see if I could build it for that amount.

So, where to start?

Donor Frame - £65

For the money you will have to consider either new "bankrupt stock" or an older second hand, good quality frame or even complete bike from eBay. Mine was to be the same vintage Marin East Peak frame that I first bought and converted back in 2009

Powder coating of above - £40

If you opt for a tatty second hand frame, then powder coating is a must. I am no snob, but appearances really count in a resort environment, why? Turn up with a shabby skibike and if you are allowed to use the lifts, your cards will be marked from the offset. Raise the attention of the management with one big crash and you may find yourself refused access; worse still the next skibiker might be turned away too. Spray paint lacks the durability to withstand the many knocks and scratches that skibikes are subject to, hence powder coating is your best choice.

Spray paint lacks durability - powder coating is your best choice

My rear triangle was very chipped, I opted for a blast and refinish in glossy skibiker black to match the forks I had chosen. The result was spectacular, but I made the error of removing the bearings, but not putting something in their place as a mask. As a result, I had to spent a tedious couple of hours sanding away the powder coat to be able to refit the bearings, bummer.
The main part of the frame was clear lacquer over brushed aluminium, it still looked tidy, so I simply removed the decals to make it look a bit less like a production bike.

Ski Mounts - £220

There are plenty of people who can knock something up out of angle iron and old skateboard trucks, but with kits available from BikerMads or AlpineSkiBikes for a shade over £200, it's not worth the time messing about. Furthermore, in France, some adapter kits have been given type approval homologation, allowing their use on the lift systems just like factory produced skibikes. I fitted the SkiXBike adapters as the price is slightly better when you take the final cost including; EU import duties, handling fees and VAT into account.


SkiXBike adapters - a shade over £200


Skis - £99

What! SnowBlades can be sourced in the summer months for about £50, but for a little bit more you are likely to find something with a wooden core. Wood core skis are considered much more durable for the dynamics of skibiking, especially the loads that the front ski is subject too. The last thing you want to do is snap a ski half way down the red run at the end of the day.
I fitted Head "Big Easy" 95cm skiboards, which have a good track record for use on skibikes.


Head "Big Easy" 95cm skiboards


Forks - £70

Keith Bontrager's often quoted aphorism; "Strong. Light. Cheap. Pick Two." holds true on a tight budget. What I would aim for, is strong but heavy for this price, expect about 4" of travel, not a huge amount by modern standards, but enough for on piste and gentle off piste excursions.
I opted for the Suntour XCR forks, one model up from the Suntour XCM forks used on the Black Mountain Snowscoot. They have knobs to adjust pre-load and dampening, but I think they are more for show than go. This is the second pair I have bought and I know from previous seasons that they can withstand the cold reliably.


Suntour XCR forks - basic, but can withstand the cold reliably.


Rear Shock - £30

You can forget Fox or even Manitou at this price point. What you will get is something from the far east with a spring and possibly some form of dampening, one the plus side the spring should still be up to the job and can be quickly swapped out to suit your body weight. Avoid cross-country type air shocks, at freezing temperatures the seals are prone to sudden failure, once that happens you go from "full sus" to "hard tail" in the blink of an eye. Unfortunately for me, the 165mm length, eye to eye, shocks to match my frame are becoming very scarce and I simply refuse to pay the same amount for a tiny suspension unit as I would pay to put 4 springs on my car. My only option, with time running out before departure day, was an undamped unit, more on this at the end.


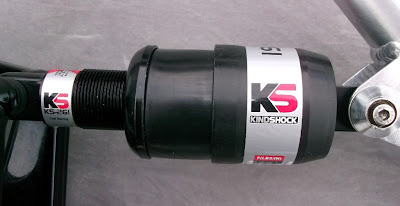
165mm eye to eye shocks are becoming very scarce


Saddle - £10

Forget fancy racing saddles here, what you are looking for is a chunky bit of padding to stop you getting intimately acquainted with the frame or the seat post. Most intermediate level skibike riders spend as much time on the pegs as sat down. The cheapo supermarket own brand "comfort" saddle is ideal, robust enough to last a few weeks and dirt cheap to replace if it fails.

HandleBars- £20

You don't need to get carried away, but seek a known brand name with a brace bar. I was able to get Marin's own brand for this price, the brace is a handy place to attach the safety leash for use on chairlifts.

Stem Raiser or Adjustable Stem - £20

These are very handy items to "dial in" the skibike to your requirements. As a rule of thumb a skibike is better balanced with the handle bars much higher and with much less reach than the equivalent wheeled frame. Get this wrong and the front ski becomes very difficult to control with dire results. I fitted a Raleigh adjustable stem and set it to 55 degrees and the minimum of reach. This put the handle bars at a height that I found comfortable, but with much less reach than I had become accustomed to. It actually worked really well and I never changed it.


Raleigh adjustable stem - putting the handle bars at a comfortable height


Lock on grips - £20

Most metals shrink as they get colder, condensation that forms on cold metal acts as a fine lubricant. Put these two facts together and the rubber hand grips which appeared to be welded in place back in the workshop, easily come loose whilst out on the snow. Make a sudden turn and the grip remains in your hand whilst the handlebars go their own sweet way.
Lock on grips are the solution to this dilemma, I found the ODI ones to be excellent, for this project I used GT, which weren't quite so good, but did the job.

Miscellaneous fixtures and fittings - £30

The little things like a safety leash, stainless bolts and the anti-dive preventer for the rear ski,don't cost much, but the total can ramp up.
I made up an anti-dive link from some welded chain, then ran it through some plastic flexi pipe, which prevents it from sagging when not under load. I incorporated a D shackle link to make for quick mounting and two O-rings which gave a bit of compliance and reduced the tendency for the link to snatch going over bumps.
I make the safety leash out of two of the shoulder straps used on small carry bags joined together with a split ring. An inexpensive jumbo carabiner goes on one end and can be snapped onto the handlebar brace when required.


Anti-dive link fabricated from welded chain


Sum Total of the Above £624

The last item to consider is the time you need to put into assembly, after all, it is the single item that none of us know how much we have left.
To mount the skis to the adapters, fabricate the rear ski anti-dive link and assemble the various components would take me about 8 hours. I am getting quicker with every skibike I build, but I am not a quick worker.

Evaluation & Testing

Testing is a strange feeling, often it goes like this; one day you have all these parts on your workshop floor, the next you have a fully assembled skibike and the day after you are standing on snow ready for the first run. You reach the top of the chairlift without knowing what will happen next; will the skibike ride like a dream or are you heading for a hellish, uncontrollable descent? Luckily, my first run wasn't hellish, but it wasn't pefect either.


Skibike test - my first run wasn't hellish, but it wasn't pefect either

The Head skis are; shorter, wider, more flexible and with a deeper sidecut than the Line skis I have become accustomed to. This gave the steering a buttery and soft feeling which worked well in deeper snow, but could lack bite on icier sections. I found it too easy to overpower the front ski, loose the front end and do the classic superman ejection with this combination. For next season I would like to mod all my front ski adapters to incorporate some form of axial travel limiter, such as the Lenz skibikes and even the new generation of Black Mountain Snow Scoots utilise.

I think the SkiXBike adapters are very slightly lower than the Alpine Skibikes design that they so closely emulate. They are well made, but some of the detailing, such as; the fit of the springs, washers and nuts are not quite as good as the original system.

The rear shock I used was only 160mm and not 165mm from eye to eye, you wouldn't think that 5mm could make much of a difference, but the effect is amplified at the end of the swing arm.
As a result this skibike sits about an Inch lower than my other skibike, the effect is negligible in a straight line but when leaning for turns it was noticeable that it was easier to catch the side of a boot on the snow and on some bumps the bottom bracket shell would crash through the snow.


Skibike test - the bottom bracket shell would crash through the snow


The SkiXBike adapters are supplied with a pair of BMX knurled pegs, the surface on these is as sharp as a rasp file when indoors, but get some snow on them and it fills up the troughs and turns to ice under foot pressure. Once this has happened you have absolutely no grip what so ever on the foot pegs, when riding in a straight line this is fine, but make a turn or stand on the pegs and your foot will fly off unpredictably. I had to ditch them after one ride and received a cracking offer for a pair of Alpine Skibikes foot pegs.

The first D-shackle fitted to the rear ski anti-dive link shook loose on a particularly hard and icy run at the start of day 2, luckily I had a spare in my pocket and that evening treated my stock of spare D-shackles to a dose of Loctite Blue thread locking compound. There were no further issues with lost links, in fact quite the opposite happened and I needed mole grips to release it one icy afternoon. I was expecting the O rings to snap at some point, but they took a huge amount of abuse and I found the progressive stretch to work really well at controlling the attitude of the rear ski, without any snatching from the anti-dive link.

The saddle rails on the £4 supermarket saddle were prone to bending under even modest loads, I am no heifer (80kg), but it happened to 2 identical saddles in single day on each. On the flip side, the saddle represented the same amount of money as one piste side eatery was asking for a small container of chips! In future, I shall go for something a little more robust for skibike use.


Cheap saddle failure - a false economy


Conclusion

The SkiXBike footpegs, rear spring/shock absorber and saddle fell below the standards required of a skibike for recreational touring around ski resorts. They were all parts that can be rapidly swapped out for more suitable items. None of my mods were calculated with great engineering precision, I simply follow the plug and chop school of backyard engineering.

I went over budget by over £100 or 20% and there are not many items I could have scrimped further on, in fact I should have spent a little more on the shock, at which point you might be able to buy a new SledgeHammer skibike for the same money. It would probably work just as well, if not better, but might be a tad heavier too. On the other hand in the Summer I can put the wheels, etc. back on my skibike and head off to where I choose and get full value from my investment.

At the risk of becoming tedious let me re-iterate what I said at the beginning of this article.
Yes, you can build something for peanuts if you have the time, skills and materials, but few people have the skills to build from scratch and not everyone enjoys it. I managed to build a working skibike for approximately £600, it suited drifting and skidding, more than carving, it was fun to ride and quite forgiving in nature.

Whatever you chose to build, has to perform well, ride safely and look good, failure is not an option. Good luck.

Looking for parts to build a skibike? Or perhaps one ready to ride away? See our Parts For Sale page here.